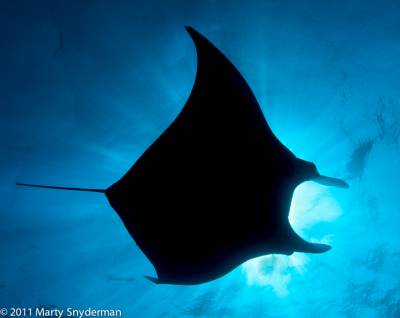
Silhouettes can be very powerful images. And compared to many other types of underwater photographs, they are relatively easy to create. However, to create a winning silhouette you will want to pay heed to a handful of basic principles. It’s those principles that I am going to share in this piece.
To get started, let’s consider what factors make a strong silhouette. That’s easy:
1) A subject that has an interesting shape,
2) Sharp contrast between the subject and the background it is positioned against, and
3) Crisp lines that separate the subject from the background.
In the underwater world we are really fortunate to have a multitude of subjects that have interesting shapes. A variety of sharks, manta rays, turtles, dolphins, pods of dolphins, boat hulls, divers, seals and sea lions provide some excellent examples.

With regard to seeing sharp contrast between the subject to be silhouetted and its background, the first “rule of silhouettes” is that in order to capture a strong silhouette with your camera you must first see a distinctly silhouetted subject in the water. This is a big deal. Without seeing the contrast between subject and background as you set up your shot, there is no chance that your camera will create an impactful silhouette. And that’s true no matter how much your mother loves you!
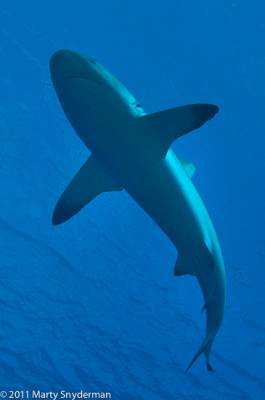
In short, you need to see that contrast underwater when you set up your shot, in order to create the strong silhouette you want. In underwater settings strong contrast is almost always created by seeing a black, or near black, subject positioned against a bright background of bluish to greenish water. You can see what I mean by looking at the silhouette of the almost pure black shark positioned against the bright blue water in the image below.

Now let’s look at an example image that resulted in a disappointing attempt at a silhouette. It’s easy to see that the there is not much contrast between the shark and the water, and the resulting photograph lacks impact.

Some people will ask if it is possible to create a strong silhouette with Picture-Fix or other software. The answer is, you can increase the contrast to some degree, but you are much better off to shot only when you see the desired contrast underwater.
So, what do you do if you don’t see the contrast? The answer is change something. That something might be your shooting angle, the distance to your subject, your depth, or your orientation to your subject with regard to the sun etc. But whatever you do, try something different. As you surely know, simply hoping for a better result is not a winning strategy.
With regard to creating a silhouette in which crisp lines separate your subject from the background, using a relatively fast shutter speed will go a long way toward helping you accomplish that goal. I suggest a minimum shutter speed of 1/125th of a second, and faster (1/250th or 1/500th of a second as examples) when you have enough light to use a faster shutter speed. Fast shutter speeds “freeze” action, and that results in crisp lines that separate the subject from its background.
So let’s assume you see a great subject, the requisite contrast, and you have enough light that you can use a fast shutter speed. Then what do you do. All you need to do is properly expose the background water that is immediately next to your subject and keep distractions such as rising exhaust bubbles out of your frame.
Exactly how you go about properly exposing the water in the background will depend upon the camera you have and the features it incorporates. If you have a camera that gives you the ability to take a light meter reading as you establish your camera settings, you will want to meter the water, not the subject. It’s the water you want to expose properly. The subject will appear black, or near black, or, in essence, under exposed in your silhouette. The water will appear properly exposed.
To accomplish the goal of taking your light meter reading on the water, you will probably want to use your camera’s “spot metering” capability if that is an available feature.
We hope you find the information and images presented here helpful. And, we hope to see you back again on the 1st. If you did benefit from this blog, please tell a friend about it.
Thank you,
0 0 1 670 3822 Chegg Deals 31 8 4484 14.0Normal 0 false false false EN-US JA X-NONE
Marty Snyderman From the Vivid-Pix Gang
